Find us on Google+ sophielouisew_: August 2012

Thursday 30 August 2012

Review // MUA Out There Plumping Lipgloss in Nude


Buy me here - link!

If anyone's thinking I have bought too many lip products recently, you are very much correct. This is another piece from my MUA haul and I think I'm going to have to be horribly honest and say that this is my least favourite of the bits I ordered. When you pull the wand out of the tube, there's hardly any gloss on it, even if you give it a good 'dunk' a couple of times. This makes it really rough when applying to the lips, and even when you do finally get some sort of coverage, the colour isn't anything to rant and rave about. It just adds a slight sheen to the lips but doesn't look glossy at all - more as though you've just licked your lips and not bothered drying them off. I was so disappointed with this, as it looked really promising when I swatched it on the back of my hand. And as for being a 'plumping' gloss - there is absolutely nothing about this that plumps the lips. No tingly feeling or any evidence of fuller looking lips. I suppose I can't complain too much as it was just £2 and then 25% off, but it's still a bummer when you don't like a product.

Enjoy


Wednesday 29 August 2012

Review // MUA Pearl Eyeshadow in Shade 11


Buy me here - link!

Today is the day of another MUA review from my mini haul. This was a bit of a spur of the moment purchase and actually the only eyeshadow I currently own. I know this will be a shock to a lot of people but eyeshadow just doesn't suit me at all - i don't know what it is about it, but it's always been a no-go area for me. I bought this on a whim as it was just £1, and I'll be honest, I don't really know what drew me to this particular shade. I have hazel eyes, so went for a similar, complimentary shade. In the first two photos it doesn't look at all as it does in natural light, but the swatches show the real colour. I'll be honest - I haven't actually used this yet, not even for experimenting, but I'm sure I'll get round to trying it out for a night out or something of the sort. The thing I did love that I found from swatching is the variety of shades you can get from the eyeshadow - a light shimmery brown can be built up to hit a really deep, opaque shade. The light-catching pigments will look brilliant aswell.
I know this isn't much of a review, but didn't want to leave it out of the haul posts!

Enjoy

Tuesday 28 August 2012

Review // e.l.f Lipstick in Nostalgic


with flash

without flash


Buy me here - link!

It's beauty reviews galore on the blog lately, and here's another from a recent e.l.f haul.
Any #bblogger or make-up savvy girl will know how strenuous the hunt for the perfect nude lipstick can be, and for me it's still ongoing. 
Up until very recently I didn't wear lipstick all that much, but have ended up with a fair few in the last month or so. e.l.f's lipsticks retail at just £1.50 and I think this is the most nudey colour from their collection so I had to try it out. I'd say it has a pinky hue to it which actually helps prevent it from looking quite cakey and thick like I've seen with lots of other nude shade on the market. You can see in the pictures how moisturising the product looks on the lips and not at all too matte which was something I was preparing myself for. It's surprisingly soft and smooth and not sticky once applied and it has some good staying power for its price! I think my pale complexion helps with this particular shade and that on more tanned skintones it may end up looking much more like the dreaded foundation lips. 
I am really impressed with this product and will definitely be adding more of the e.l.f lipsticks to my collection! 

Enjoy

Monday 27 August 2012

Review // e.l.f Cover Everything Concealer & Concealer Brush


Buy Them Here
Concealer - £2.50 for 4g - link!
Brush - £1.50 - link!

Today brings another beauty review, this time from part of my e.l.f haul when there was a promotion for £1 delivery. e.l.f is a brand that I've heard a lot about in the #bblogger world, but never got round to trying for myself, but £1 postage + payday meant that the time had come! 
I placed an order from e.l.f and MUA on the same day, and ended up buying a concealer from both - you can see my review of the MUA concealer here and read about how I was never much of a wearer of concealer. 
I'll start my saying that I much prefer this to the MUA one that I purchased. I again went for the lightest shade due to my pale complexion and found that this blended in to compliment my skintone much better. The initial layer in the little pot does look a little oily, but I think this was mainly down to a bit of condensation during delivery and is perfectly fine now I've used it a few times. This has a lot better coverage than MUA and blends in much more smoothly. If I'm honest, I haven't used the brush all that much - it's great for precise application but I have resorted back to dabbing it on with the tip of my finger as using the brush can end up a little cakey and it does blend in a lot better using this method. 
As this is in the same budget as the MUA product, I'd definitely recommend e.l.f as the winner in the concealer stakes! The consistency feels a lot thinner, but gives a better coverage without leaving your skin feeling clogged. 
If you've not tried e.l.f before - you are missing out!!! 

Enjoy


Sunday 26 August 2012

Review // MUA Brush-On Concealer Pen


Beauty review time! Expect lots of these on the blog in the near future after making a couple of mini hauls from MUA and e.l.f a few weeks ago whilst they both had some unmissable promotions going on. MUA were offering 25% off plus free shipping, and after hearing so many good reviews about their products I thought I'd give the brand a go.
Unfortunately I can't find this piece online anymore to link you to, and I'm not sure if it's available instore at the moment, but one thing I purchased was the Brush-On Concealer Pen. I went for the lightest shade (1-Radiance) as you can see that I have horrendously pale skin. I'm not usually a wearer of concealer and just tend to dab a little extra foundation around blemishes or darker areas, but for less than £2 I thought I'd give it a go. 
Initially it looks like quite a poor shade match, but once it's been blended in to the skin it does actually match my skin tone quite well. It does have quite a thick consistency which does make you feel as though you're getting good coverage, but can look a little cakey if you apply too much aswell as your foundation. The brush does tend to get a little clogged up so I would recommend giving it a good clean after use, which I know is time consuming, but you can't complain for such a bargain product. 
The brush applicator is a bonus too - it saves you depositing too much product onto the skin and instantly starts blending on application!
If you're looking for a cheap concealer, then this is definitely one of the products for you!

Enjoy

Saturday 25 August 2012

Review // Urban Beauty United Lasharazzi Eyelash Curlers


you may have seen a recent post from me about a new brand i came across on a recent holiday to spain - Urban Beauty United  and this is another purchase that i made; the Lasharazzi eyelash curler.

again these cost me either €2.99 or €3.99 (around £3, i honestly can't remember!), which i think is an absolute bargain for what looked like a decent eyelash curler in the packet. they have a very professional look to them, and they didn't disappoint - they're so gentle on the lash when curling and they don't tug or pull when releasing the curlers. they also don't clump my lashes together like i've experienced in the past. 

as with my previous post  i've found that UBU stock their products in the  UK in Asda and Tesco. personally, i've never seen it in any of my local stores, but i'll be keeping an eye out in the future for them.
i'll add a link to the website so if you're not from the UK, then you can see where UBU is stocked near you.


Enjoy


Friday 24 August 2012

OOTD // Spanish Shopping


Top // Spanish Store
Jeans // Primark
Espadrilles // Primark
Links of London dupe // French Jewellers
Feather Anklet // Claires Accessories
Infinity Anklet // Ebay
Earrings // Ebay

sorry for looking so grumpy in the first photo - if you hadn't noticed by now, i'm not the most photogenic person in the world, which is a bit rubbish in the blogging world!

i found this beauty of a top on my holiday to spain and i couldn't leave it behind! it cost me 14 euros, which i thought was a bit of a bargain considering the exchange rate. it was the lace detailing yoke and the bright coral shade that instantly drew me to it, but once i saw it up close i loved the collar too! i feel like i own far too many sleeveless, chiffon-style shirts so this is such a fresh change from that for me. its so nice to not have the buttons done up to my neck (i know it's my choice to do that, but i just like them that way!), especially when it's warmer in the summer. a lot of sheer panels in tops can often end up looking messy with bra straps showing through, but this has actually been made very cleverly as the edge of the sleeves runs symmetrically with your bra strap, so where it's thicker where the hem is, you don't see the bra strap - genius! the tie detailing is also still low on the shirt which is another bonus, as i hate that this feature usually causes the shirt to ride up and appear more like a crop-top.

Enjoy


Wednesday 22 August 2012

OOTD // Hello Darling


Top // H&M
Jeans // Primark
Plimsols // Primark
Links of London dupe // French Jewellers
Feather Anklet // Claires Accessories
Infinity Anklet // Ebay

just a quick casual/everyday post today. i don't have much to say about this outfit if i'm honest, except that it's comfortable and practical (something i don't necessarily go for). the floral detailing makes the cute saying even more adorable!

Enjoy


Tuesday 21 August 2012

everyday make-up #1


today i bring you my first everyday make-up post. when i say everyday, i don't mean sitting around the house doing nothing, this is what i'd apply if i was actually going to leave the house for a couple of hours at least!

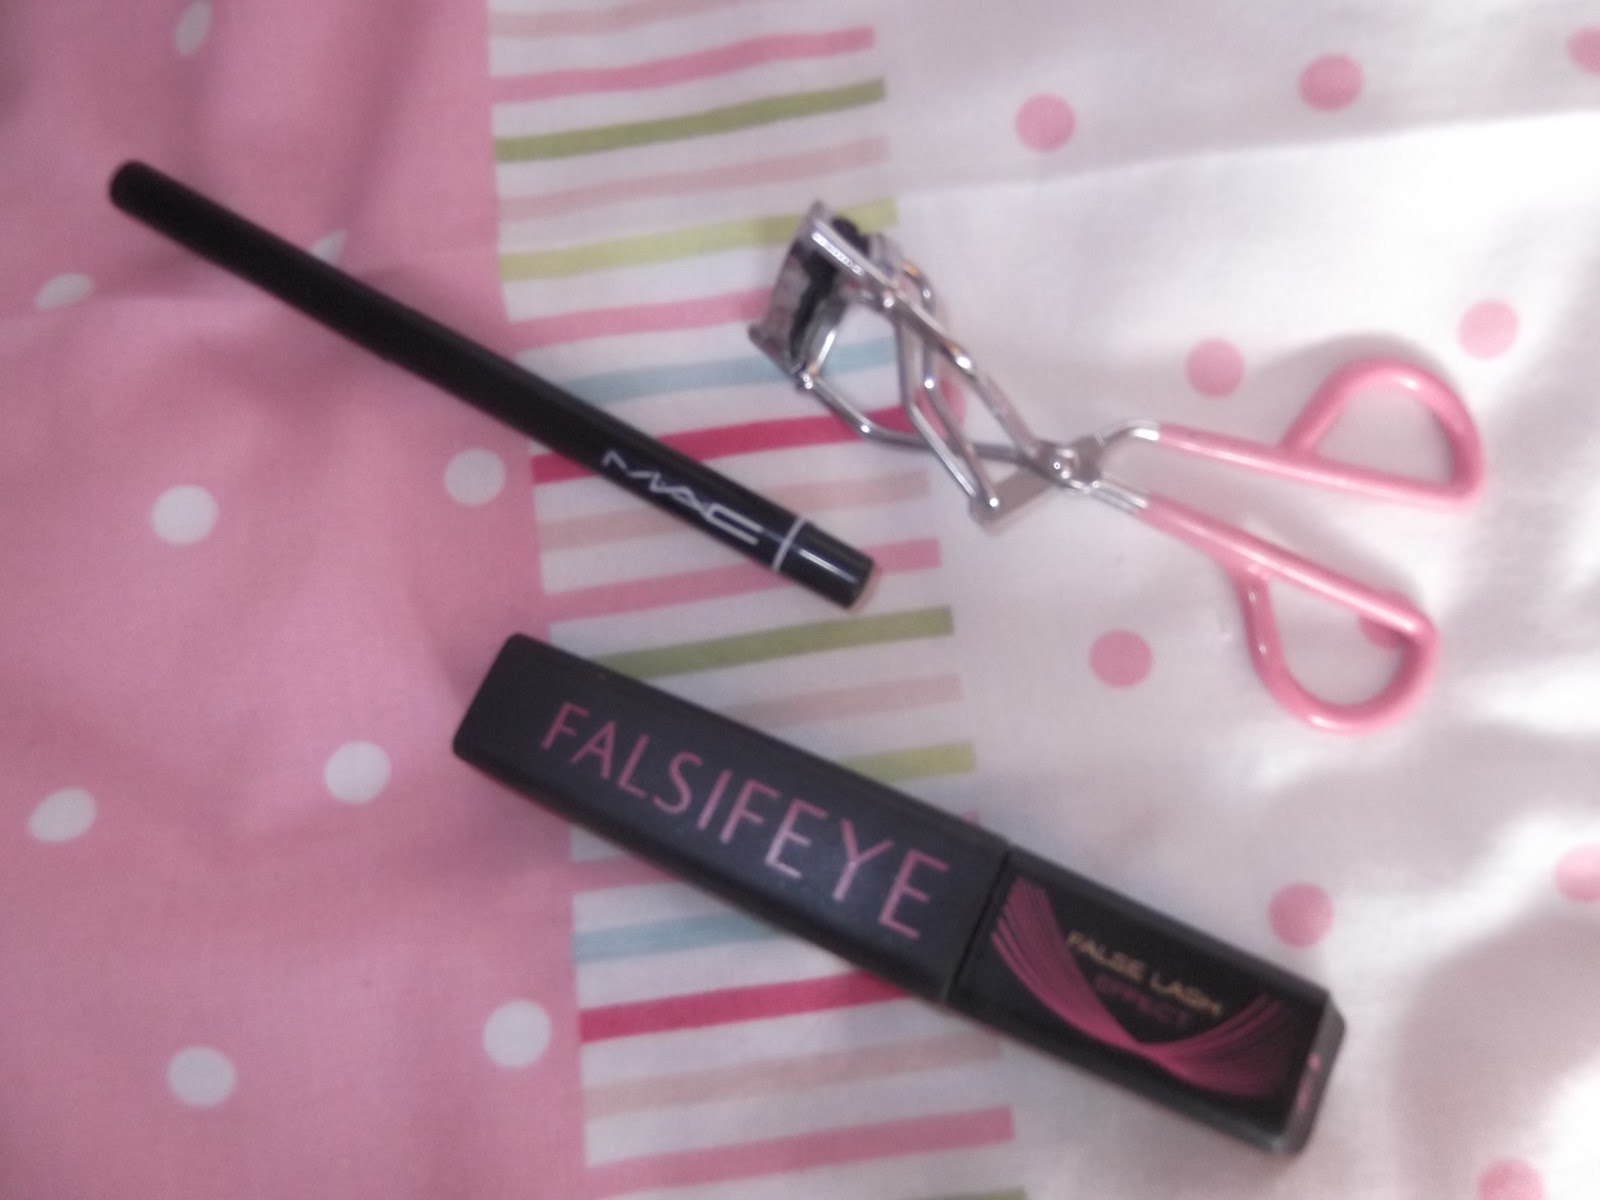
all the products used.


Step One // Base
oo1 // Benefit 'That Gal' Brightening Primer // dispense a small amount onto the tip of the finger and transfer to face - one dot on each cheek, and a strip across the forehead. rub into the skin, making sure every inch is covered!
oo2 //  Yves Saint Laurent Touche Eclat Foundation in BD40 and Body Collection Foundation Brush // dispense a small amount of your moisturiser of choice onto the face of your hand, then add the required amount of foundation. blend together on your hand before applying to the face - i apply in the same way i apply my foundation, and then touch-up any areas that look as though they need a little more coverage.


Step Two // Highlighting and Enhancing
oo3 // Benefit High Beam // apply a line across your brown bone, eyelid, and lower lash line and blend into the skin using the tip of your finger using dabbing or circular motions.
oo4 // Benefit Posie Tint // using the brush, add the desired amount to the apple of your cheek, then blend in thoroughly using your finger tips, again with a dabbing or circular motion.


Step Three // Ensuring Full Coverage 
oo5 // 2true Matte Pressed Powder and Superdrug Powder Brush // apply all over the face, ensuring it's blended in around your jawline. less is more!
oo6 // Collection 2000 Blush and Urban Beauty United Brush // coat the brush (ensuring the whole width of the brush is covered) with the desired amount of blush and apply along the cheekbone.


Step Four // Eyes
oo7 // M.A.C Waterproof Eyeliner Pencil // i apply to the inner of my upper and lower lash line, which i know isn't to everyone's taste, but this can also be applied above the top lash line.
oo8 // Primark Eyelash Curlers and 17 Falsifeye Falsh Lash Effect Mascara in Black // curl bare lashed, and apply a generous coat of mascara - make sure you catch the very inner and outer lashes. wait for mascara to dry and curl the lashes again so they retain their shape.


Step Five // Lips
oo9 // Benefit Hoola Lipgloss // to complete the look, slick on a layer of Hoola gloss for a natural sheen on the lips.

if you have any questions about this look, don't hesitate to ask!

Enjoy